A How-To
Gilding as a craft intimidated me for the longest time. Before I tried it, the little bit I thought I knew about it was its difficulty—I pictured gold leaf flying everywhere, the ultimate diligence and meticulous technique required, and the special, unique, costly materials that would likely be required. I pictured the Palace of Versailles, rococo extravagance, excessive filigree.
But, I’ve found that gilding is actually quite straightforward to practice, and it creates beautiful results. You just need patience, steady hands, and access to appropriate materials.
In this post, I overview some of the materials, techniques, and considerations that you may want to keep in mind if you venture into the art of gilding. I refer mostly to gold leaf for simplicity, but know that there are many types of leaf available out there, not just gold. All of this, of course, is not a professional gilder’s opinion, but that of an amateur, gilding crafter. Fair disclosure.
What are you gilding?
You can gild pretty much anything—furniture, art, paper, fabric, even food. Just make sure that the surface you are gilding is properly prepared to accept the gold leaf. Porous surfaces are more difficult to cover well, whereas smooth surfaces accept the gold leaf more readily. And if you are gilding food, please purchase edible leafing!
Types of materials
The gold leaf itself
There are multiple types of materials for gilding. First, perhaps, is whether it is attached to transfer paper or is loose. Transfer paper is the easiest, whereas loose leaf is harder. With transfer gilding, the metal is attached to a backing paper. It is easy to place (i.e., it doesn’t fly everywhere).
On the other hand, with loose leaf sheets, the gilding is only separated by paper, but not attached to it. This type is more difficult to use—it is tricky to pick up out of the sheet, and difficult to place, but it is very versatile, and easy to pinpoint in application.
Types of metals
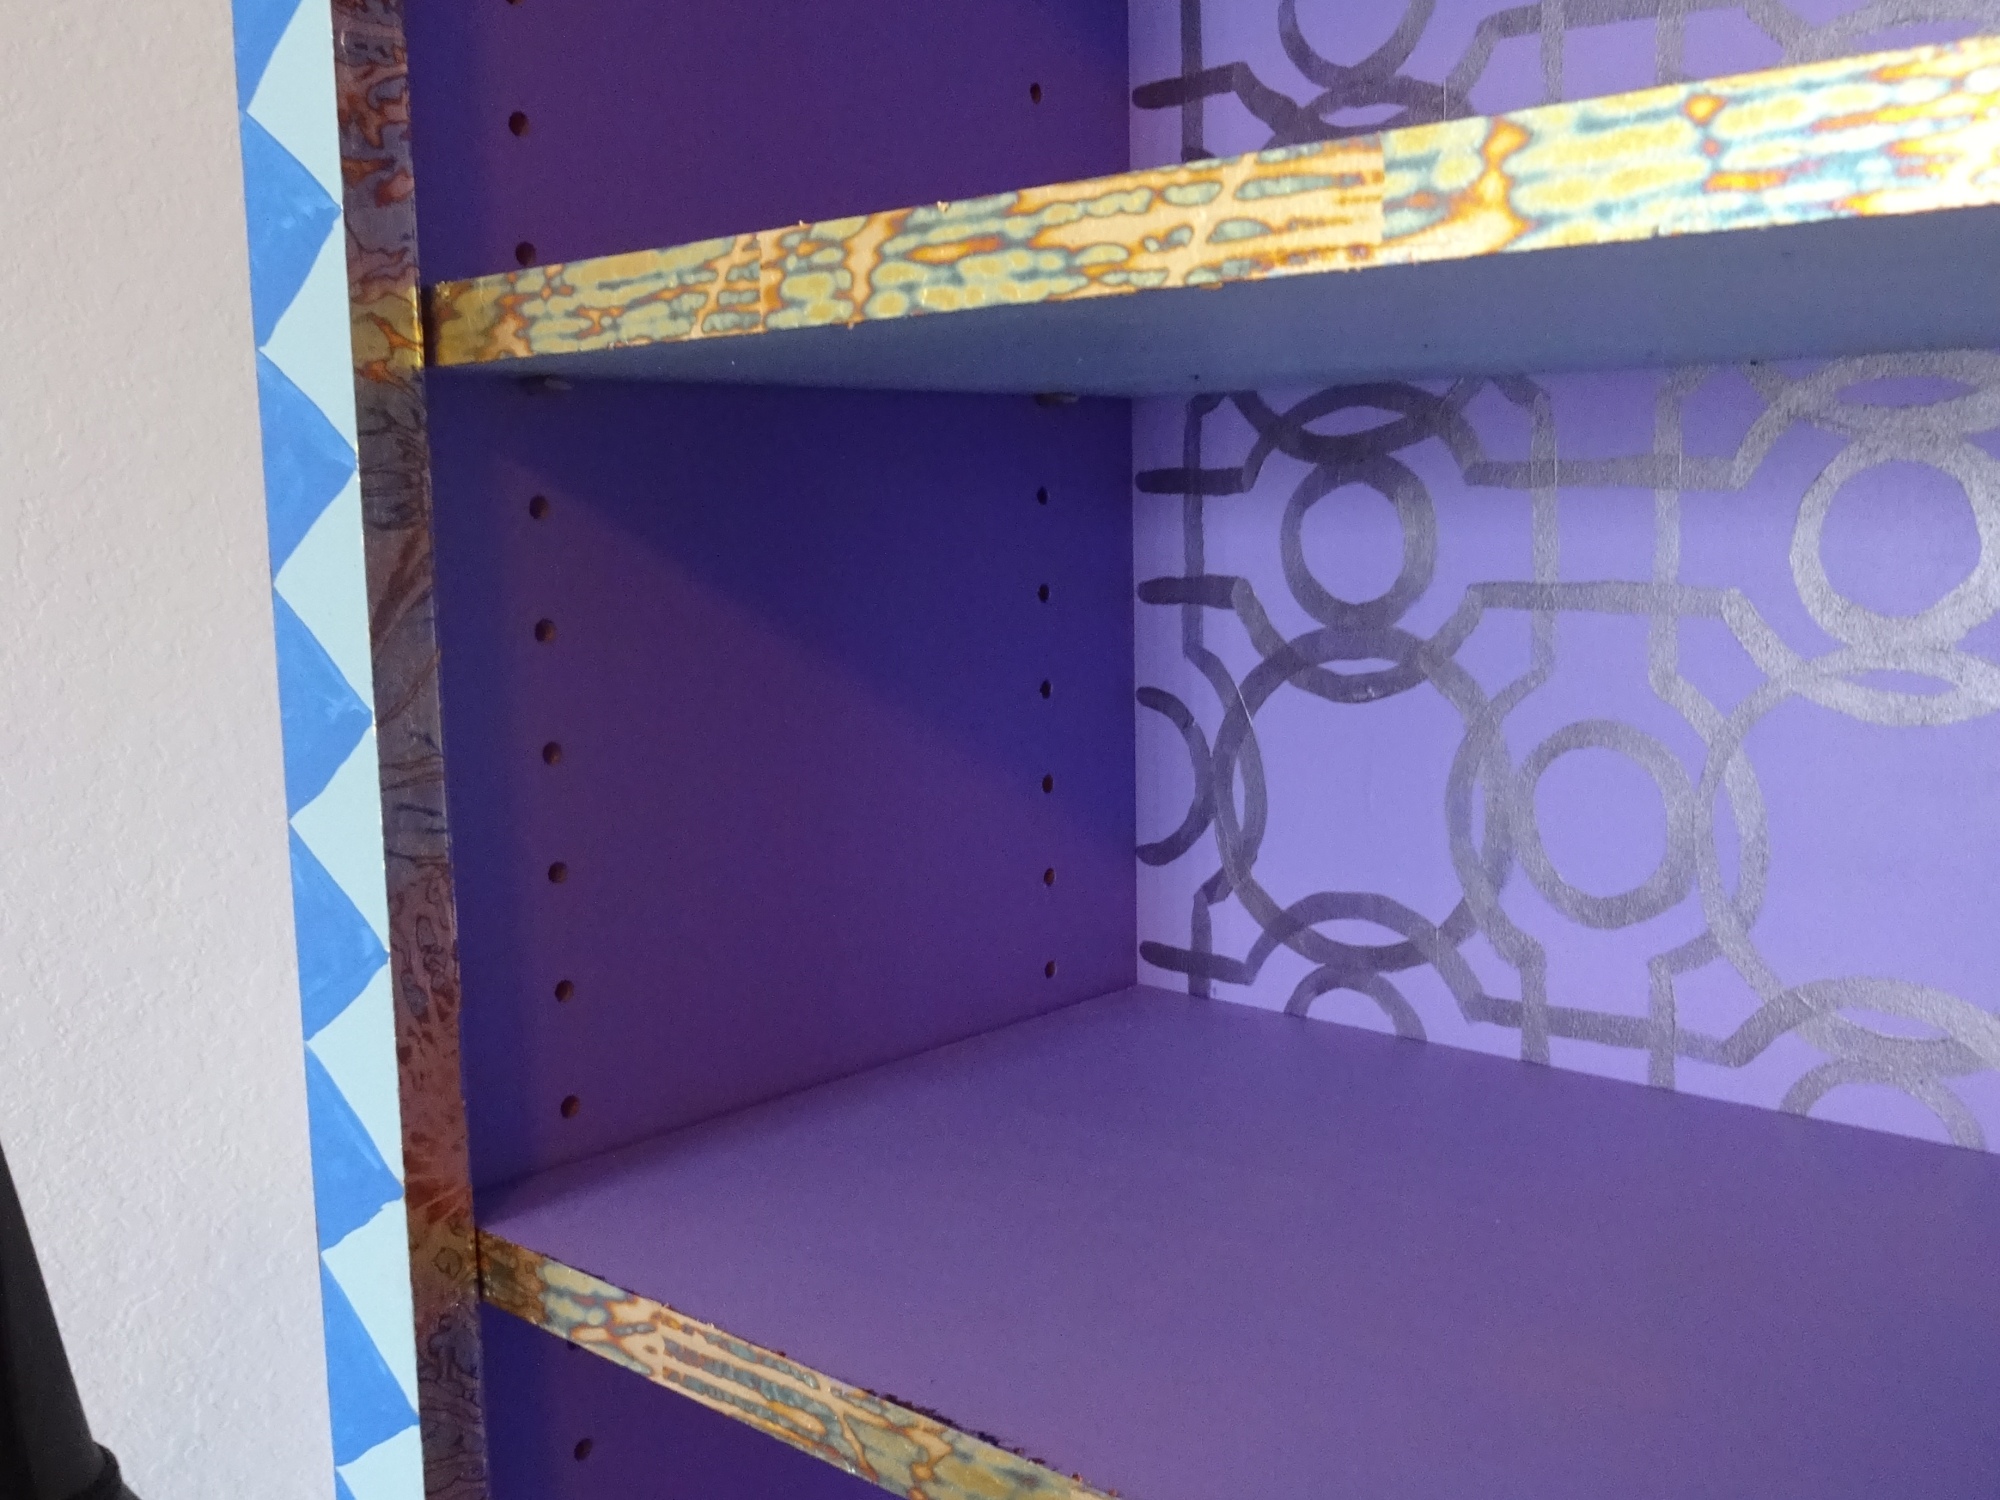
Another aspect to consider is what type of metal the gold leaf consists of. Some gold leafs are pure gold, or pure silver, copper, or another metal. Others are composites, imitation, or beautiful patterns. Pure metals are more expensive, but less likely to corrode over time. Composite and imitation metals can be more economical, but also must be treated in order to maintain their luster over the long term.
When choosing between all of these options, you should consider a few things: the look you are going for, the longevity of the materials, and the ease of application. There are some beautiful options available online as well as in brick-and-mortar craft stores. Make sure to consider the square footage of the areas you wish to cover, with extra, when decided how much leafing to purchase. You will definitely want extra, because proper technique dictates that the sheets overlap to avoid gaps (which inherently produces some wastage), and because it’s far too easy for sheets to disintegrate under the slightest pressure; the smaller the pieces become, the less you will be able to reuse those pieces to cover empty areas.
Other materials
The other materials to consider are the glue, the brushes, gloves, and the finish.
Glue/Sizing: The glue (also known as sizing) used for gilding is a runny, milky liquid, and dries clear. It is similar to a PVA glue, but much less viscous. When the glue has dried and become tacky, it is ready to accept the gold leaf.
It is difficult to see whether you have placed the glue everywhere you need it to go; it is also difficult to ensure that you haven’t placed glue where it’s not supposed to go. If you are planning to gild details, you may consider using painter’s tape to mark off the areas you don’t want covered. It’s easier to not gild then to remove or cover gilding that you don’t want.
When you apply the gold leaf to the sizing, you will find out whether or not the glue is everywhere it needs to be, because the gold leaf will not stick to any areas that do not have glue, or that do not have glue that has properly cured. The good news is that glue can be reapplied, and the gold leaf, too, and the results are pretty seamless.
Brushes: It is helpful to have two types of brushes: a wide, flat brush for picking up the leaf, and smaller, pouf brushes for brushing away the excess leaf. You can purchase special brushes for these, but truthfully, I think that for the amateur crafter, any brush you might have that fits the description would be helpful.
Gloves: Thin cotton gloves are helpful to keep the leaf and glue from sticking to your fingers, but are not necessary.
Finish: Non-pure gold and other metals will need to be sealed to prevent them from tarnishing.
Techniques
Practice is important because using loose gold leaf is difficult. When I first tried it, it was in the seventies outside, and slightly humid, but we had to turn the fans off because little pieces of gold leaf were flying everywhere. Lesson learned—don’t try to gild under a fan.
Here are the steps that I followed:
- Prepare the surface. First, we sanded, primed, and painted the surface of the furniture that we were gilding. For clean edges, we applied painter’s tape around the target areas. I would recommend using tape unless you are painting a freestyle design or are absolutely certain that you can paint a clean line.
- Applying the glue/sizing. Next, we applied the glue to the target areas in a thin but consistent coating. Like any fine glue, be sure to clean your brush thoroughly, and/or use a brush that you don’t care about too much—the glue will dry very hard.
- Wait for the glue to become tacky. Once the glue is tacky (it should feel sticky if you press it with your finger), you can start applying the leaf. In my experience, this process took about ten to twenty minutes, but the timing certainly depends on the climatic conditions of your work space. If it’s not tacky, it’s either not ready, or you didn’t apply enough and need to try again.
- Free the leaf. If using loose leaf, you must cajole the leaf out of the packet and onto your brush or fingers. This is easier said than done, all because of our frenemy, static electricity. I found it helpful to rub the brush against a corner of the leaf until it started pulling towards the brush; then, I could slip the brush or my fingers under the corner and pull it out of the sheet. If you are using leaf with transfer paper, luckily you can skip this step.
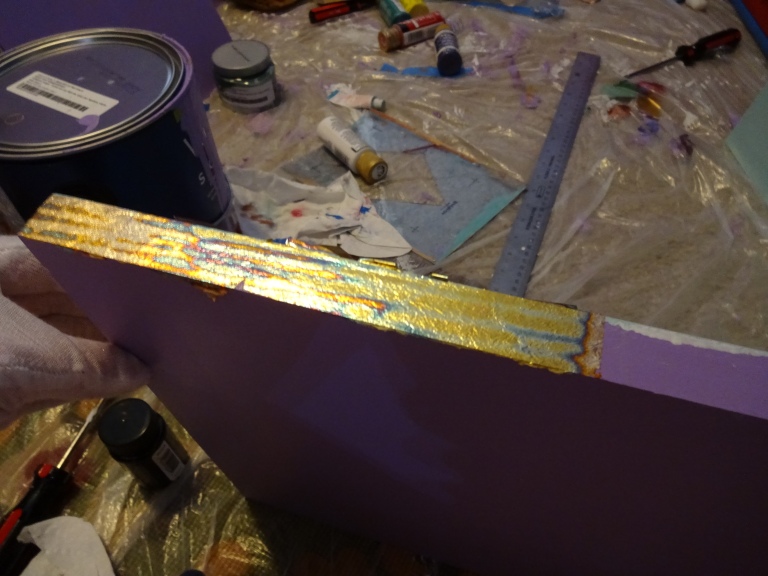
- Apply the leaf. This is the fun part. You take the leaf, lay it on the area you wish to gild, and press the leaf onto the surface. I found that firmly rubbing against the leaf, once applied, or the transfer paper, ensured that the metal adhered to as much of the surface as possible. Loose leaf will adhere quite readily, but it may not adhere everywhere right at once, so if you apply too little pressure, the leaf may pull away from the surface, and you will have to reapply the leaf to that section.
- Polish. Once the applied leaf has time to set, rub into the leaf to make sure it is adhering everywhere, and any excess leaf is brushed off the surface. If found my gloved fingers worked very well for this. A poufy brush also works well for removing excess leaf.
- Repeat steps two through five. Sometimes, despite your best preparations, the leaf will not adhere. You may need to go over an area multiple times to cover any areas missed in your first pass, or, if necessary, reapply the glue and start again.
- Some types of leaf must be sealed to prevent tarnishing.
- Admire your craftiness.
Outcomes and lessons
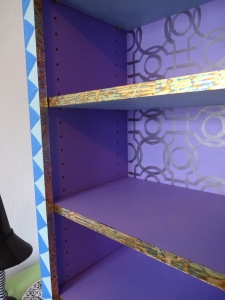
My favorite aspect of this project was the application of the variegated gold leaf. It creates a beautiful, rich pattern that subtly catches the eye when you are close enough to see the detail.
In application, I found that the silver leaf rarely performed as expected. While the color was acceptable, the leaf adhered to the surface, even in places where I was certain that I had not put glue. This outcome may have been impacted by the relative humidity levels in the work space, but the other leafs did not have the same problem. In a few instances, I had to paint over the gold leaf to save the composition.
It is difficult but not impossible to apply gold leaf to curved and upside-down surfaces. You may want to be less ambitious and start with something flat.
Gilding is messy, unless (probably) you are an experienced professional and know what you are doing. I ended up with little bits of metal stuck all over my arms and legs.
Ultimately, though, gilding is so much easier than it looks, and the results it can create are stunning. Give it a try–you’ll be pleased with the results.
More information
For more specific technical guidance and product recommendations, I would recommend checking out this website: http://www.goldleafsupplies.co.uk/how_to/how_to.php?ID=1.
In another post, I will consider other materials that can be considered when you want to achieve the effect of gilding, without quite so much of the hassle.

I am so happy I came upon your blog 😀🙂 😘
LikeLike